Saturday, 27 October 2012

Hot Air Balloon V. 2.0

0 comments
The Design!
Design

The design and materials used for our second hot air balloon didn't differ much from our first. We chose to use the same garbage bag as we did in the previous hot air balloon, deciding that a normal grocery bag would be too small. However, rather than using straws, we used wire to connect our candles to the garbage bag. We also chose to use 10 small birthday candles, attaching them to the wires by using tape and small pieces of straw. We had hope that by using a few more candles than we did in the previous experiment, we would be able to produce enough heat to fill up the large bag, allowing it to float.

Results

Unfortunately our bag was still too large to be able to float. As for improvements, we could use a smaller garbage bag and perhaps a different design that would hold the candles in place better.

Thursday, 4 October 2012

Star Gazing!

0 comments
The moon!
Having seen the moon on so many occasions before, I'd never really regarded it's beauty or significance until seeing it up close. Sure I'd seen clear images of the moon through Google images and various other websites, but it was an entirely different experience being able to see it in person. I was also able to see Neptune, though it appeared as just a tiny speck through the telescope. One of the astronomers also showed a group of us two stars named Alberio, which, he explained, only has one name since we weren't aware that it was actually two stars at the time. We were also shown Saturn, as well as a blurry view of a globular cluster of stars.  

One astronomer was nice enough to give us his tumblr url so we could follow him and continue to learn about the night sky. Here's his url: http://astrogeoguy.tumblr.com/Having the telescopes and astronomers come show and teach us about constellations and planets was a real treat. It was both fun and educational, two things that rarely combine. If given the opportunity, I would jump at the chance to be able to do this again.


Hot Air Balloon?

0 comments
The Design
Design

Initially, upon first hearing of the hot air balloon experiment, my group and I had predicted that it would be much easier in comparison to the egg lander. However, we quickly learned that this wasn't the case. Our design was quite simple, resulting in a total of 8 candles, 4 of which formed a small square and another 4 that formed another larger square, surrounding the smaller one. A full length straw extended from each corner of the larger square and were attached to the garbage bag.

Results

After having already witnessed a couple of failures with groups' designs that were similar to ours, my group had lost what little hope we had. Once it came time for us to test our balloon, we lit our candles and prayed for a miracle. Unfortunately, our balloon failed to work due to the weight and size of the garbage bag.    Well, back to the drawing boards.

Friday, 28 September 2012

Plan B

0 comments
The outer structure. 
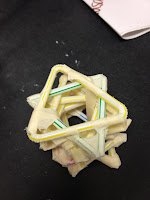
Hoping for different results from our previous experiment, our group thought long and hard about what design we could possibly use in order to ensure the survival of our egg. We came up with idea after idea, scrapped them and then did so all over again. Finally, running out of time, we decided to build something that would make the most out of our straws. We decided that it'd be best if we had an outer layer as well as an inner one to give our egg as much protection as possible. Our outer layer was a simple cube (or what was meant to look like a cube). 

Half of the inside structure.


Our inner layer took a bit more contemplation. Initially, we had just planned to attach the egg from each corner of the cube and secure it in the middle, but remembering that the same design had failed in the first experiment, we were hesitant towards using that method. Although we did still end up attaching the        egg in the middle, we did so in a way that the egg was secured by two layers that sandwiched the egg (as shown on the left) and then attached to the cube with multiple straws. By using all these straws to attach the egg to the cube, we could ensure that they all shared the brunt of the impact. This was also a very effective way to securely hold the egg in the middle of our cube. 

Completed structure.
Be strong little guy!

To the left is an image of our completed structure. Since we had a few extra straws we had not used, we decided to cut them up into pieces and use them as legs on each of the corners. Though we knew this wouldn't do too much for the survival of our egg, we decided we could use all the help that we could get.


All that was left was to keep our fingers crossed and hope our egg would survive. 


AND THE MOMENT OF TRUTH ...


Happy to be alive!

Saturday, 15 September 2012

Egg Lander

0 comments

Design

The design for our egg lander was a relatively simple one. Our goal was to use the straws and wrap the egg in such a way that it would take the least amount of impact. When doing so, we did not want the egg to be wrapped in a rigid casing, knowing that the straws would not take the brunt of the impact and the egg would easily crack. After some contemplation, we decided to build our structure out of alternating triangularly shaped straws. We found that this created a base that was was not rigid, but rather had some bounce to it. This meant that the straws itself would take most of the impact, making it more likely that the egg would survive the fall.
Once done with the base, we were stumped on how to continue. We concluded that our best course of action was to simply wrap the remaining surface of the egg with exactly the same design used for the base. When finished with that however, we were met with yet another problem. Knowing that the bottom of the structure was the only place that could really handle the entirety of the impact, we now had to come with with a way to ensure that our egg lander would land bottom first. Agreeing that we should put the newspaper to use, we built something that resembled the shape of a badminton shuttlecock. Once we attached that to the top of our structure, all that was left was to keep our fingers crossed and hope that our egg would survive.


Top of the lander on the left, base of lander on the right.
Results

R.I.P :'(
Unfortunately, our egg did not survive the fall. Although the egg did land bottom first as planned, our structure was not able to protect it from the impact and the egg plummeted to it's death. I believe that our structure did not work because we did not take the weight of the egg into account. In addition, we underestimated exactly just how much force the egg would have to withstand from its drop.


Modifications

There were several modifications that we could have made in order to help ensure the safety of our egg:


  • Modify our design so that the sides are protected just as well as the bottom.
  • Perhaps have a separate outer layer to increase the amount of time of impact, decreasing the amount of impact the egg would have to withstand.

Hopefully I can use everything I learned from this first egg lander to my advantage when building the second (hopefully successful) lander.